User Management
User Configuration

Proxmox Backup Server supports several authentication realms, and you need to choose the realm when you add a new user. Possible realms are:
- pam:
Linux PAM standard authentication. Use this if you want to authenticate as a Linux system user. The users needs to already exist on the host system.
- pbs:
Proxmox Backup Server realm. This type stores hashed passwords in
/etc/proxmox-backup/shadow.json.- openid:
OpenID Connect server. Users can authenticate against an external OpenID Connect server.
- ldap:
LDAP server. Users can authenticate against external LDAP servers.
- ad:
Active Directory server. Users can authenticate against external Active Directory servers.
After installation, there is a single user, root@pam, which corresponds to
the Unix superuser. User configuration information is stored in the file
/etc/proxmox-backup/user.cfg. You can use the proxmox-backup-manager
command-line tool to list or manipulate users:
# proxmox-backup-manager user list
┌─────────────┬────────┬────────┬───────────┬──────────┬────────────────┬────────────────────┐
│ userid      │ enable │ expire │ firstname │ lastname │ email          │ comment            │
╞═════════════╪════════╪════════╪═══════════╪══════════╪════════════════╪════════════════════╡
│ root@pam    │      1 │        │           │          │                │ Superuser          │
└─────────────┴────────┴────────┴───────────┴──────────┴────────────────┴────────────────────┘
The superuser has full administration rights on everything, so it's recommended
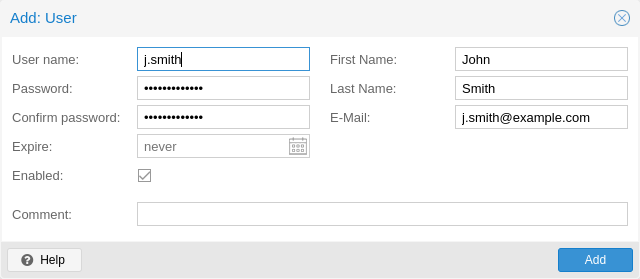
to add other users with less privileges. You can add a new
user with the user create subcommand or through the web
interface, under the User Management tab of Configuration -> Access
Control. The create subcommand lets you specify many options like
--email or --password. You can update or change any user properties
using the user update subcommand later (Edit in the GUI):
# proxmox-backup-manager user create john@pbs --email john@example.com
# proxmox-backup-manager user update john@pbs --firstname John --lastname Smith
# proxmox-backup-manager user update john@pbs --comment "An example user."
The resulting user list looks like this:
# proxmox-backup-manager user list
┌──────────┬────────┬────────┬───────────┬──────────┬──────────────────┬──────────────────┐
│ userid   │ enable │ expire │ firstname │ lastname │ email            │ comment          │
╞══════════╪════════╪════════╪═══════════╪══════════╪══════════════════╪══════════════════╡
│ john@pbs │      1 │        │ John      │ Smith    │ john@example.com │ An example user. │
├──────────┼────────┼────────┼───────────┼──────────┼──────────────────┼──────────────────┤
│ root@pam │      1 │        │           │          │                  │ Superuser        │
└──────────┴────────┴────────┴───────────┴──────────┴──────────────────┴──────────────────┘
Newly created users do not have any permissions. Please read the Access Control section to learn how to set access permissions.
You can disable a user account by setting --enable to 0:
# proxmox-backup-manager user update john@pbs --enable 0
Or completely remove a user with:
# proxmox-backup-manager user remove john@pbs
API Tokens
Any authenticated user can generate API tokens, which can in turn be used to configure various clients, instead of directly providing the username and password.
API tokens serve two purposes:
Easy revocation in case client gets compromised
Limit permissions for each client/token within the users' permission
An API token consists of two parts: an identifier consisting of the user name,
the realm and a tokenname (user@realm!tokenname), and a secret value. Both
need to be provided to the client in place of the user ID (user@realm) and
the user password, respectively.

The API token is passed from the client to the server by setting the
Authorization HTTP header with method PBSAPIToken to the value
TOKENID:TOKENSECRET.
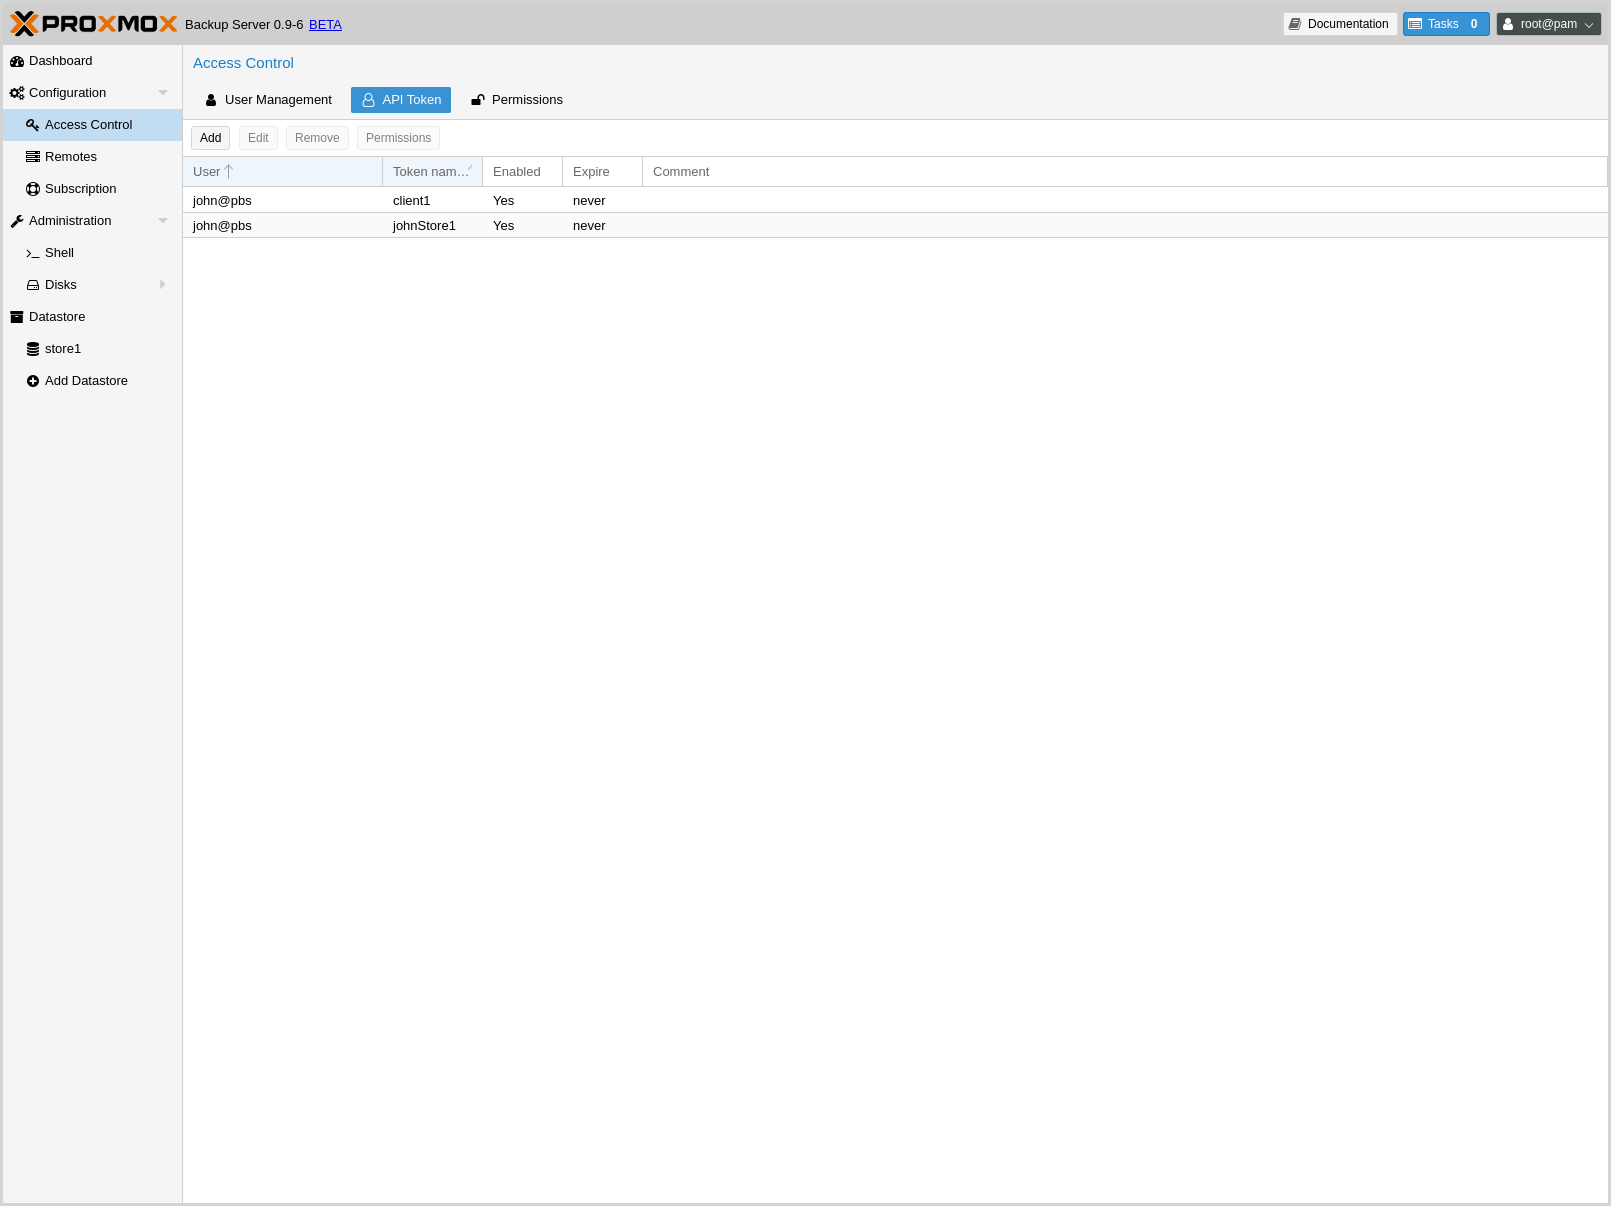
You can generate tokens from the GUI or by using proxmox-backup-manager:
# proxmox-backup-manager user generate-token john@pbs client1
Result: {
  "tokenid": "john@pbs!client1",
  "value": "d63e505a-e3ec-449a-9bc7-1da610d4ccde"
}
Note
The displayed secret value needs to be saved, since it cannot be displayed again after generating the API token.
The user list-tokens sub-command can be used to display tokens and their
metadata:
# proxmox-backup-manager user list-tokens john@pbs
┌──────────────────┬────────┬────────┬─────────┐
│ tokenid          │ enable │ expire │ comment │
╞══════════════════╪════════╪════════╪═════════╡
│ john@pbs!client1 │      1 │        │         │
└──────────────────┴────────┴────────┴─────────┘
Similarly, the user delete-token subcommand can be used to delete a token
again.
Warning
Direct/manual edits to token.shadow may take up to 60 seconds (or
longer in edge cases) to take effect due to caching. Restart services for
immediate effect of manual edits.
Newly generated API tokens don't have any permissions. Please read the next section to learn how to set access permissions.
Access Control
By default, new users and API tokens do not have any permissions. Instead you need to specify what is allowed and what is not.
Proxmox Backup Server uses a role- and path-based permission management system. An entry in the permissions table allows a user, group or token to take on a specific role when accessing an 'object' or 'path'. This means that such an access rule can be represented as a triple of '(path, user, role)', '(path, group, role)' or '(path, token, role)', with the role containing a set of allowed actions, and the path representing the target of these actions.
Privileges
Privileges are the building blocks of access roles. They are internally used to enforce the actual permission checks in the API.
We currently support the following privileges:
- Sys.Audit
Sys.Audit allows a user to know about the system and its status.
- Sys.Modify
Sys.Modify allows a user to modify system-level configuration and apply updates.
- Sys.PowerManagement
Sys.Modify allows a user to power-off and reboot the system.
- Datastore.Audit
Datastore.Audit allows a user to know about a datastore, including reading the configuration entry and listing its contents.
- Datastore.Allocate
Datastore.Allocate allows a user to create or delete datastores.
- Datastore.Modify
Datastore.Modify allows a user to modify a datastore and its contents, and to create or delete namespaces inside a datastore.
- Datastore.Read
Datastore.Read allows a user to read arbitrary backup contents, independent of the backup group owner.
- Datastore.Verify
Allows verifying the backup snapshots in a datastore.
- Datastore.Backup
Datastore.Backup allows a user create new backup snapshots and also provides the privileges of Datastore.Read and Datastore.Verify, but only if the backup group is owned by the user or one of its tokens.
- Datastore.Prune
Datastore.Prune allows a user to delete snapshots, but additionally requires backup ownership.
- Permissions.Modify
Permissions.Modify allows a user to modify ACLs.
Note
A user can always configure privileges for their own API tokens, as they will be limited by the users privileges anyway.
- Remote.Audit
Remote.Audit allows a user to read the remote and the sync configuration entries.
- Remote.Modify
Remote.Modify allows a user to modify the remote configuration.
- Remote.Read
Remote.Read allows a user to read data from a configured Remote.
- Sys.Console
Sys.Console allows a user to access the system's console, note that for all but root@pam a valid system login is still required.
- Tape.Audit
Tape.Audit allows a user to read the configuration and status of tape drives, changers and backups.
- Tape.Modify
Tape.Modify allows a user to modify the configuration of tape drives, changers and backups.
- Tape.Write
Tape.Write allows a user to write to a tape media.
- Tape.Read
Tape.Read allows a user to read tape backup configuration and contents from a tape media.
- Realm.Allocate
Realm.Allocate allows a user to view, create, modify and delete authentication realms for users.
Access Roles
An access role combines one or more privileges into something that can be assigned to a user or API token on an object path.
Currently, there are only built-in roles, meaning you cannot create your own, custom role.
The following roles exist:
- NoAccess
Disable Access - nothing is allowed.
- Admin
Can do anything, on the object path assigned.
- Audit
Can view the status and configuration of things, but is not allowed to change settings.
- DatastoreAdmin
Can do anything on existing datastores.
- DatastoreAudit
Can view datastore metrics, settings and list content. But is not allowed to read the actual data.
- DatastoreReader
Can inspect a datastore's or namespace's content and do restores.
- DatastoreBackup
Can backup and restore owned backups.
- DatastorePowerUser
Can backup, restore, and prune owned backups.
- RemoteAdmin
Can do anything on remotes.
- RemoteAudit
Can view remote settings.
- RemoteSyncOperator
Is allowed to read data from a remote.
- TapeAdmin
Can do anything related to tape backup.
- TapeAudit
Can view tape-related metrics, configuration and status.
- TapeOperator
Can do tape backup and restore, but cannot change any configuration.
- TapeReader
Can read and inspect tape configuration and media content.
Objects and Paths
Access permissions are assigned to objects, such as a datastore, namespace or some system resources.
We use filesystem-like paths to address these objects. These paths form a natural tree, and permissions of higher levels (shorter paths) can optionally be propagated down within this hierarchy.
Paths can be templated, meaning they can refer to the actual id of a configuration entry. When an API call requires permissions on a templated path, the path may contain references to parameters of the API call. These references are specified in curly brackets.
Some examples are:
|
Access to all datastores on a Proxmox Backup Server |
|
Access to a specific datastore on a Proxmox Backup Server |
|
Access to a specific namespace on a specific datastore |
|
Access to all remote entries |
|
Access to configure the host network |
|
Access to tape devices, pools and jobs |
|
User administration |
|
Administrative access to a specific OpenID Connect realm |
Inheritance
As mentioned earlier, object paths form a file system like tree, and permissions can be inherited by objects down that tree through the propagate flag, which is set by default. We use the following inheritance rules:
Permissions for API tokens are always limited to those of the user.
Permissions on deeper, more specific levels replace those inherited from an upper level.
Configuration & Management
Access permission information is stored in /etc/proxmox-backup/acl.cfg. The
file contains 5 fields, separated using a colon (':') as a delimiter. A typical
entry takes the form:
acl:1:/datastore:john@pbs:DatastoreBackup
The data represented in each field is as follows:
aclidentifierA
1or0, representing whether propagation is enabled or disabled, respectivelyThe object on which the permission is set. This can be a specific object (single datastore, remote, etc.) or a top level object, which with propagation enabled, represents all children of the object also.
The user(s)/token(s) for which the permission is set
The role being set
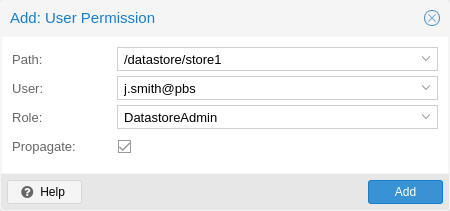
You can manage permissions via Configuration -> Access Control ->
Permissions in the web interface. Likewise, you can use the acl
subcommand to manage and monitor user permissions from the command line. For
example, the command below will add the user john@pbs as a
DatastoreAdmin for the datastore store1, located at
/backup/disk1/store1:
# proxmox-backup-manager acl update /datastore/store1 DatastoreAdmin --auth-id john@pbs
You can list the ACLs of each user/token using the following command:
# proxmox-backup-manager acl list
┌──────────┬───────────────────┬───────────┬────────────────┐
│ ugid     │ path              │ propagate │ roleid         │
╞══════════╪═══════════════════╪═══════════╪════════════════╡
│ john@pbs │ /datastore/store1 │         1 │ DatastoreAdmin │
└──────────┴───────────────────┴───────────┴────────────────┘
A single user/token can be assigned multiple permission sets for different datastores.
Note
Naming convention is important here. For datastores on the host,
you must use the convention /datastore/{storename}. For example, to set
permissions for a datastore mounted at /mnt/backup/disk4/store2, you would use
/datastore/store2 for the path. For remote stores, use the convention
/remote/{remote}/{storename}, where {remote} signifies the name of the
remote (see Remote below) and {storename} is the name of the datastore on
the remote.
API Token Permissions
API token permissions are calculated based on ACLs containing their ID, independently of those of their corresponding user. The resulting permission set on a given path is then intersected with that of the corresponding user.
In practice this means:
API tokens require their own ACL entries
API tokens can never do more than their corresponding user
Effective Permissions
To calculate and display the effective permission set of a user or API token,
you can use the proxmox-backup-manager user permission command:
# proxmox-backup-manager user permissions john@pbs --path /datastore/store1
Privileges with (*) have the propagate flag set

Path: /datastore/store1
- Datastore.Audit (*)
- Datastore.Backup (*)
- Datastore.Modify (*)
- Datastore.Prune (*)
- Datastore.Read (*)
- Datastore.Verify (*)

# proxmox-backup-manager acl update /datastore/store1 DatastoreBackup --auth-id 'john@pbs!client1'
# proxmox-backup-manager user permissions 'john@pbs!client1' --path /datastore/store1
Privileges with (*) have the propagate flag set

Path: /datastore/store1
- Datastore.Backup (*)
Two-Factor Authentication
Introduction
With simple authentication, only a password (single factor) is required to successfully claim an identity (authenticate), for example, to be able to log in as root@pam on a specific instance of Proxmox Backup Server. In this case, if the password gets leaked or stolen, anybody can use it to log in - even if they should not be allowed to do so.
With two-factor authentication (TFA), a user is asked for an additional factor to verify their authenticity. Rather than relying on something only the user knows (a password), this extra factor requires something only the user has, for example, a piece of hardware (security key) or a secret saved on the user's smartphone. This prevents a remote user from gaining unauthorized access to an account, as even if they have the password, they will not have access to the physical object (second factor).
Available Second Factors
You can set up multiple second factors, in order to avoid a situation in which losing your smartphone or security key locks you out of your account permanently.
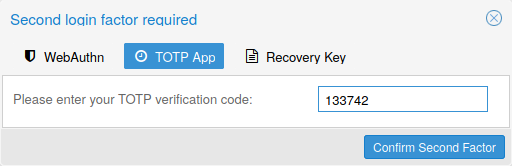
Proxmox Backup Server supports three different two-factor authentication methods:
TOTP (Time-based One-Time Password). A short code derived from a shared secret and the current time, it changes every 30 seconds.
WebAuthn (Web Authentication). A general standard for authentication. It is implemented by various security devices, like hardware keys or trusted platform modules (TPM) from a computer or smart phone.
Single use Recovery Keys. A list of keys which should either be printed out and locked in a secure place or saved digitally in an electronic vault. Each key can be used only once. These are perfect for ensuring that you are not locked out, even if all of your other second factors are lost or corrupt.
Setup
TOTP
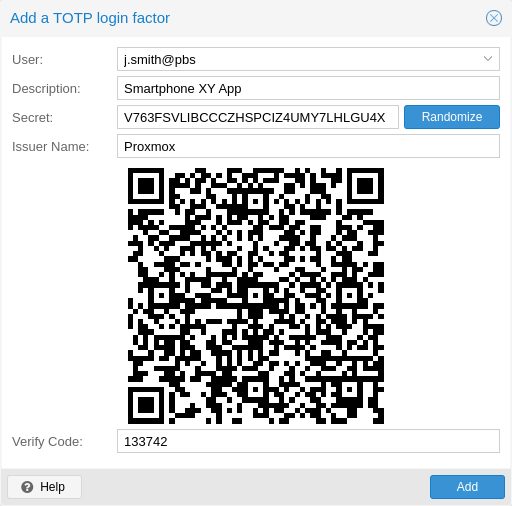
There is no server setup required. Simply install a TOTP app on your smartphone (for example, FreeOTP) and use the Proxmox Backup Server web-interface to add a TOTP factor.
WebAuthn
For WebAuthn to work, you need to have two things:
A trusted HTTPS certificate (for example, by using Let's Encrypt). While it probably works with an untrusted certificate, some browsers may warn or refuse WebAuthn operations if it is not trusted.
Setup the WebAuthn configuration (see Configuration -> Other in the Proxmox Backup Server web interface). This can be auto-filled in most setups.
Once you have fulfilled both of these requirements, you can add a WebAuthn configuration in the Two Factor Authentication tab of the Access Control panel.
Recovery Keys
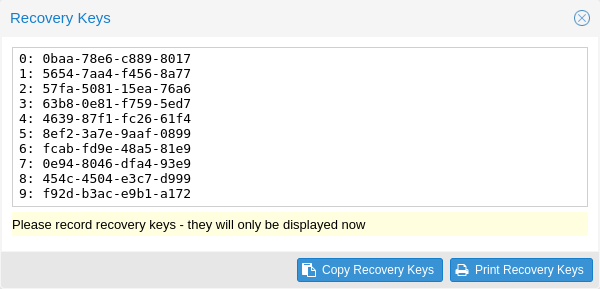
Recovery key codes do not need any preparation; you can simply create a set of recovery keys in the Two Factor Authentication tab of the Access Control panel.
Note
There can only be one set of single-use recovery keys per user at any time.
TFA and Automated Access
Two-factor authentication is only implemented for the web-interface. You should use API Tokens for all other use cases, especially non-interactive ones (for example, adding a Proxmox Backup Server to Proxmox VE as a storage).
Limits and Lockout of Two-Factor Authentication
A second factor is meant to protect users if their password is somehow leaked or guessed. However, some factors could still be broken by brute force. For this reason, users will be locked out after too many failed 2nd factor login attempts.
For TOTP, 8 failed attempts will disable the user's TOTP factors. They are unlocked when logging in with a recovery key. If TOTP was the only available factor, admin intervention is required, and it is highly recommended to require the user to change their password immediately.
Since FIDO2/Webauthn and recovery keys are less susceptible to brute force attacks, the limit there is higher (100 tries), but all second factors are blocked for an hour when exceeded.
An admin can unlock a user's Two-Factor Authentication at any time via the user list view in the web UI, or using the command line:
proxmox-backup-manager user tfa unlock joe@pbs
Authentication Realms
Linux PAM
Linux PAM is a framework for system-wide user authentication. These users are
created on the host system with commands such as adduser.
If PAM users exist on the host system, corresponding entries can be added to Proxmox Backup Server, to allow these users to log in via their system username and password.
Proxmox Backup authentication server
This is a Unix-like password store, which stores hashed passwords in
/etc/proxmox-backup/shadow.json. Passwords are hashed using the SHA-256
hashing algorithm.
This is the most convenient realm for small-scale (or even mid-scale) installations, where users do not need access to anything outside of Proxmox Backup Server. In this case, users are fully managed by Proxmox Backup Server and are able to change their own passwords via the GUI.
LDAP
Proxmox Backup Server can utilize external LDAP servers for user authentication.
To achieve this, a realm of the type ldap has to be configured.
In LDAP, users are uniquely identified by their domain (dn). For instance,
in the following LDIF dataset, the user user1 has the unique domain
uid=user1,ou=People,dc=ldap-test,dc=com:
# user1 of People at ldap-test.com
dn: uid=user1,ou=People,dc=ldap-test,dc=com
objectClass: top
objectClass: person
objectClass: organizationalPerson
objectClass: inetOrgPerson
uid: user1
cn: Test User 1
sn: Testers
description: This is the first test user.
In in similar manner, Proxmox Backup Server uses user identifiers (userid)
to uniquely identify users. Thus, it is necessary to establish a mapping
between a Proxmox Backup Server userid and an LDAP dn. This mapping is
established by the user-attr configuration parameter - it contains the name
of the LDAP attribute containing a valid Proxmox Backup Server user identifier.
For the example above, setting user-attr to uid will have the effect
that the user user1@<realm-name> will be mapped to the LDAP entity
uid=user1,ou=People,dc=ldap-test,dc=com. On user login, Proxmox Backup
Server will perform a subtree search under the configured Base Domain
(base-dn) to query the user's dn. Once the dn is known, an LDAP
bind operation is performed to authenticate the user against the LDAP server.
As not all LDAP servers allow anonymous search operations, it is possible to
configure a bind domain (bind-dn) and a bind password (password).
If set, Proxmox Backup Server will bind to the LDAP server using these
credentials before performing any search operations.
A full list of all configuration parameters can be found at domains.cfg.
Note
In order to allow a particular user to authenticate using the LDAP server, you must also add them as a user of that realm in Proxmox Backup Server. This can be carried out automatically with syncing.
Active Directory
Proxmox Backup Server can also utilize external Microsoft Active Directory
servers for user authentication.
To achieve this, a realm of the type ad has to be configured.
For an Active Directory realm, the authentication domain name and the server
address must be specified. Most options from LDAP apply to
Active Directory as well, most importantly the bind credentials bind-dn
and password. This is typically required by default for Microsoft Active
Directory. The bind-dn can be specified either in AD-specific
user@company.net syntax or the common LDAP-DN syntax.
The authentication domain name must only be specified if anonymous bind is requested. If bind credentials are given, the domain name is automatically inferred from the bind users' base domain, as reported by the Active Directory server.
A full list of all configuration parameters can be found at domains.cfg.
Note
In order to allow a particular user to authenticate using the Active Directory server, you must also add them as a user of that realm in Proxmox Backup Server. This can be carried out automatically with syncing.
Note
Currently, case-insensitive usernames are not supported.
User Synchronization in LDAP/AD realms
It is possible to automatically sync users for LDAP and AD-based realms, rather
than having to add them to Proxmox Backup Server manually. Synchronization
options can be set in the LDAP realm configuration dialog window in the GUI and
via the proxmox-backup-manager ldap and proxmox-backup-manager ad
commands, respectively.
User synchronization can be started in the GUI under Configuration > Access
Control > Realms by selecting a realm and pressing the Sync button. In the
sync dialog, some of the default options set in the realm configuration can be
overridden. Alternatively, user synchronization can also be started via the
proxmox-backup-manager ldap sync and proxmox-backup-manager ad sync
command, respectively.