Host System Administration
Proxmox Backup Server is based on the famous Debian Linux distribution. This means that you have access to the entire range of Debian packages, and that the base system is well documented. The Debian Administrator's Handbook is available online, and provides a comprehensive introduction to the Debian operating system.
A standard Proxmox Backup Server installation uses the default repositories from Debian, so you get bug fixes and security updates through that channel. In addition, we provide our own package repository to roll out all Proxmox related packages. This includes updates to some Debian packages when necessary.
We also deliver a specially optimized Linux kernel, based on the Ubuntu kernel. This kernel includes drivers for ZFS.
The following sections will concentrate on backup related topics. They will explain things which are different on Proxmox Backup Server, or tasks which are commonly used on Proxmox Backup Server. For other topics, please refer to the standard Debian documentation.
ZFS on Linux
ZFS is a combined file system and logical volume manager, designed by Sun Microsystems. There is no need to manually compile ZFS modules - all packages are included.
By using ZFS, it's possible to achieve maximum enterprise features with low budget hardware, and also high performance systems by leveraging SSD caching or even SSD only setups. ZFS can replace expensive hardware raid cards with moderate CPU and memory load, combined with easy management.
General advantages of ZFS:
Easy configuration and management with GUI and CLI.
Reliable
Protection against data corruption
Data compression on file system level
Snapshots
Copy-on-write clone
Various raid levels: RAID0, RAID1, RAID10, RAIDZ-1, RAIDZ-2 and RAIDZ-3
Can use SSD for cache
Self healing
Continuous integrity checking
Designed for high storage capacities
Asynchronous replication over network
Open Source
Encryption
Hardware
ZFS depends heavily on memory, so it's recommended to have at least 8GB to start. In practice, use as much you can get for your hardware/budget. To prevent data corruption, we recommend the use of high quality ECC RAM.
If you use a dedicated cache and/or log disk, you should use an enterprise class SSD (for example, Intel SSD DC S3700 Series). This can increase the overall performance significantly.
IMPORTANT: Do not use ZFS on top of a hardware controller which has its
own cache management. ZFS needs to directly communicate with disks. An
HBA adapter or something like an LSI controller flashed in IT mode is
recommended.
ZFS Administration
This section gives you some usage examples for common tasks. ZFS itself is really powerful and provides many options. The main commands to manage ZFS are zfs and zpool. Both commands come with extensive manual pages, which can be read with:
# man zpool
# man zfs
Create a new zpool
To create a new pool, at least one disk is needed. The ashift should have the same sector-size (2 power of ashift) or larger as the underlying disk.
# zpool create -f -o ashift=12 <pool> <device>
Create a new pool with RAID-0
Minimum 1 disk
# zpool create -f -o ashift=12 <pool> <device1> <device2>
Create a new pool with RAID-1
Minimum 2 disks
# zpool create -f -o ashift=12 <pool> mirror <device1> <device2>
Create a new pool with RAID-10
Minimum 4 disks
# zpool create -f -o ashift=12 <pool> mirror <device1> <device2> mirror <device3> <device4>
Create a new pool with RAIDZ-1
Minimum 3 disks
# zpool create -f -o ashift=12 <pool> raidz1 <device1> <device2> <device3>
Create a new pool with RAIDZ-2
Minimum 4 disks
# zpool create -f -o ashift=12 <pool> raidz2 <device1> <device2> <device3> <device4>
Create a new pool with cache (L2ARC)
It is possible to use a dedicated cache drive partition to increase the read performance (use SSDs).
For <device>, you can use multiple devices, as is shown in "Create a new pool with RAID*".
# zpool create -f -o ashift=12 <pool> <device> cache <cache_device>
Create a new pool with log (ZIL)
It is possible to use a dedicated cache drive partition to increase the write performance (use SSDs).
For <device>, you can use multiple devices, as is shown in "Create a new pool with RAID*".
# zpool create -f -o ashift=12 <pool> <device> log <log_device>
Add cache and log to an existing pool
You can add cache and log devices to a pool after its creation. In this example, we will use a single drive for both cache and log. First, you need to create 2 partitions on the SSD with parted or gdisk
Important
Always use GPT partition tables.
The maximum size of a log device should be about half the size of physical memory, so this is usually quite small. The rest of the SSD can be used as cache.
# zpool add -f <pool> log <device-part1> cache <device-part2>
Changing a failed device
# zpool replace -f <pool> <old device> <new device>
Changing a failed bootable device
Depending on how Proxmox Backup was installed, it is either using grub or systemd-boot as a bootloader.
In either case, the first steps of copying the partition table, reissuing GUIDs and replacing the ZFS partition are the same. To make the system bootable from the new disk, different steps are needed which depend on the bootloader in use.
# sgdisk <healthy bootable device> -R <new device>
# sgdisk -G <new device>
# zpool replace -f <pool> <old zfs partition> <new zfs partition>
Note
Use the zpool status -v command to monitor how far the resilvering process of the new disk has progressed.
With systemd-boot:
# proxmox-boot-tool format <new ESP>
# proxmox-boot-tool init <new ESP>
Note
ESP stands for EFI System Partition, which is setup as partition #2 on bootable disks setup by the Proxmox Backup Server installer. For details, see Setting up a new partition for use as synced ESP.
With grub:
Usually grub.cfg is located in /boot/grub/grub.cfg
# grub-install <new disk>
# grub-mkconfig -o /path/to/grub.cfg
Activate e-mail notification
ZFS comes with an event daemon, ZED, which monitors events generated by the
ZFS kernel module. The daemon can also send emails upon ZFS events, such as pool
errors. Newer ZFS packages ship the daemon in a separate package zfs-zed,
which should already be installed by default in Proxmox Backup.
You can configure the daemon via the file /etc/zfs/zed.d/zed.rc, using your
preferred editor. The required setting for email notification is
ZED_EMAIL_ADDR, which is set to root by default.
ZED_EMAIL_ADDR="root"
Please note that Proxmox Backup Server forwards mails to root to the email address configured for the root user.
Limit ZFS memory usage
It is good to use at most 50 percent (which is the default) of the system memory for ZFS ARC, to prevent performance degradation of the host. Use your preferred editor to change the configuration in /etc/modprobe.d/zfs.conf and insert:
options zfs zfs_arc_max=8589934592
The above example limits the usage to 8 GiB ('8 * 2^30^').
Important
In case your desired zfs_arc_max value is lower than or equal to zfs_arc_min (which defaults to 1/32 of the system memory), zfs_arc_max will be ignored. Thus, for it to work in this case, you must set zfs_arc_min to at most zfs_arc_max - 1. This would require updating the configuration in /etc/modprobe.d/zfs.conf, with:
options zfs zfs_arc_min=8589934591
options zfs zfs_arc_max=8589934592
This example setting limits the usage to 8 GiB ('8 * 2^30^') on systems with more than 256 GiB of total memory, where simply setting zfs_arc_max alone would not work.
Important
If your root file system is ZFS, you must update your initramfs every time this value changes.
# update-initramfs -u
Swap on ZFS
Swap-space created on a zvol may cause some issues, such as blocking the server or generating a high IO load.
We strongly recommend using enough memory, so that you normally do not run into low memory situations. Should you need or want to add swap, it is preferred to create a partition on a physical disk and use it as a swap device. You can leave some space free for this purpose in the advanced options of the installer. Additionally, you can lower the swappiness value. A good value for servers is 10:
# sysctl -w vm.swappiness=10
To make the swappiness persistent, create a new file /etc/sysctl.d/99-swappiness.conf with an editor of your choice and add the following line:
vm.swappiness = 10
Value |
Strategy |
|---|---|
vm.swappiness = 0 |
The kernel will swap only to avoid an 'out of memory' condition |
vm.swappiness = 1 |
Minimum amount of swapping without disabling it entirely. |
vm.swappiness = 10 |
Sometimes recommended to improve performance when sufficient memory exists in a system. |
vm.swappiness = 60 |
The default value. |
vm.swappiness = 100 |
The kernel will swap aggressively. |
ZFS compression
To activate compression:
# zpool set compression=lz4 <pool>
We recommend using the lz4 algorithm, since it adds very little CPU overhead. Other algorithms such as lzjb, zstd and gzip-N (where N is an integer from 1-9 representing the compression ratio, where 1 is fastest and 9 is best compression) are also available. Depending on the algorithm and how compressible the data is, having compression enabled can even increase I/O performance.
You can disable compression at any time with:
# zfs set compression=off <dataset>
Only new blocks will be affected by this change.
ZFS special device
Since version 0.8.0, ZFS supports special devices. A special device in a pool is used to store metadata, deduplication tables, and optionally small file blocks.
A special device can improve the speed of a pool consisting of slow spinning hard disks with a lot of metadata changes. For example, workloads that involve creating, updating or deleting a large number of files will benefit from the presence of a special device. ZFS datasets can also be configured to store small files on the special device, which can further improve the performance. Use fast SSDs for the special device.
Important
The redundancy of the special device should match the one of the pool, since the special device is a point of failure for the entire pool.
Warning
Adding a special device to a pool cannot be undone!
To create a pool with special device and RAID-1:
# zpool create -f -o ashift=12 <pool> mirror <device1> <device2> special mirror <device3> <device4>
Adding a special device to an existing pool with RAID-1:
# zpool add <pool> special mirror <device1> <device2>
ZFS datasets expose the special_small_blocks=<size> property. size can be 0 to disable storing small file blocks on the special device, or a power of two in the range between 512B to 128K. After setting this property, new file blocks smaller than size will be allocated on the special device.
Important
If the value for special_small_blocks is greater than or equal to the recordsize (default 128K) of the dataset, all data will be written to the special device, so be careful!
Setting the special_small_blocks property on a pool will change the default value of that property for all child ZFS datasets (for example, all containers in the pool will opt in for small file blocks).
Opt in for all files smaller than 4K-blocks pool-wide:
# zfs set special_small_blocks=4K <pool>
Opt in for small file blocks for a single dataset:
# zfs set special_small_blocks=4K <pool>/<filesystem>
Opt out from small file blocks for a single dataset:
# zfs set special_small_blocks=0 <pool>/<filesystem>
Troubleshooting
Corrupt cache file
zfs-import-cache.service imports ZFS pools using the ZFS cache file. If this file becomes corrupted, the service won't be able to import the pools that it's unable to read from it.
As a result, in case of a corrupted ZFS cache file, some volumes may not be mounted during boot and must be mounted manually later.
For each pool, run:
# zpool set cachefile=/etc/zfs/zpool.cache POOLNAME
then, update the initramfs by running:
# update-initramfs -u -k all
and finally, reboot the node.
Another workaround to this problem is enabling the zfs-import-scan.service, which searches and imports pools via device scanning (usually slower).
Host Bootloader
Proxmox Backup Server currently uses one of two bootloaders, depending on the disk setup selected in the installer.
For EFI Systems installed with ZFS as the root filesystem systemd-boot is
used, unless Secure Boot is enabled. All other deployments use the standard
grub bootloader (this usually also applies to systems which are installed
on top of Debian).
Partitioning Scheme Used by the Installer
The Proxmox Backup Server installer creates 3 partitions on all disks selected for installation.
The created partitions are:
A 1 MB BIOS Boot Partition (gdisk type EF02)
A 512 MB EFI System Partition (ESP, gdisk type EF00)
A third partition spanning the configured
hdsizeparameter or the remaining space available for the chosen storage type
Systems using ZFS as a root filesystem are booted with a kernel and initrd image
stored on the 512 MB EFI System Partition. For legacy BIOS systems, and EFI
systems with Secure Boot enabled, grub is used, for EFI systems without
Secure Boot, systemd-boot is used. Both are installed and configured to
point to the ESPs.
grub in BIOS mode (--target i386-pc) is installed onto the BIOS Boot
Partition of all selected disks on all systems booted with grub (that is,
all installs with root on ext4 or xfs, and installs with root on ZFS on
non-EFI systems).
Synchronizing the Content of the ESP with proxmox-boot-tool
proxmox-boot-tool is a utility used to keep the contents of the EFI System
Partitions properly configured and synchronized. It copies certain kernel
versions to all ESPs and configures the respective bootloader to boot from
the vfat formatted ESPs. In the context of ZFS as root filesystem, this means
that you can use all the optional features on your root pool, instead of the subset
which is also present in the ZFS implementation in grub or having to create a
small, separate boot-pool (see: Booting ZFS on root with grub).
In setups with redundancy, all disks are partitioned with an ESP by the installer. This ensures the system boots, even if the first boot device fails or if the BIOS can only boot from a particular disk.
The ESPs are not kept mounted during regular operation. This helps to prevent
filesystem corruption in the vfat formatted ESPs in case of a system crash,
and removes the need to manually adapt /etc/fstab in case the primary boot
device fails.
proxmox-boot-tool handles the following tasks:
Formatting and setting up a new partition
Copying and configuring new kernel images and initrd images to all listed ESPs
Synchronizing the configuration on kernel upgrades and other maintenance tasks
Managing the list of kernel versions which are synchronized
Configuring the boot-loader to boot a particular kernel version (pinning)
You can view the currently configured ESPs and their state by running:
# proxmox-boot-tool status
Setting up a New Partition for use as Synced ESP
To format and initialize a partition as synced ESP, for example, after replacing a
failed vdev in an rpool, proxmox-boot-tool from proxmox-kernel-helper can be used.
Warning
the format command will format the <partition>. Make sure
to pass in the right device/partition!
For example, to format an empty partition /dev/sda2 as ESP, run the following:
# proxmox-boot-tool format /dev/sda2
To setup an existing, unmounted ESP located on /dev/sda2 for inclusion in
Proxmox Backup Server's kernel update synchronization mechanism, use the following:
# proxmox-boot-tool init /dev/sda2
or
# proxmox-boot-tool init /dev/sda2 grub
to force initialization with Grub instead of systemd-boot, for example for Secure Boot support.
Following this, /etc/kernel/proxmox-boot-uuids` should contain a new line with the
UUID of the newly added partition. The init command will also automatically
trigger a refresh of all configured ESPs.
Updating the Configuration on all ESPs
To copy and configure all bootable kernels and keep all ESPs listed in
/etc/kernel/proxmox-boot-uuids in sync, you just need to run:
# proxmox-boot-tool refresh
(Equivalent to running update-grub on systems with ext4 or xfs on root).
This is necessary after making changes to the kernel commandline, or if you want to sync all kernels and initrds.
Note
Both update-initramfs and apt (when necessary) will automatically
trigger a refresh.
Kernel Versions Considered by proxmox-boot-tool
The following kernel versions are configured by default:
The currently running kernel
The version being newly installed on package updates
The two latest, already installed kernels
The latest version of the second-to-last kernel series (e.g. 5.0, 5.3), if applicable
Any manually selected kernels
Manually Keeping a Kernel Bootable
Should you wish to add a certain kernel and initrd image to the list of
bootable kernels, use proxmox-boot-tool kernel add.
For example, run the following to add the kernel with ABI version 5.0.15-1-pve
to the list of kernels to keep installed and synced to all ESPs:
# proxmox-boot-tool kernel add 5.0.15-1-pve
proxmox-boot-tool kernel list will list all kernel versions currently selected
for booting:
# proxmox-boot-tool kernel list
Manually selected kernels:
5.0.15-1-pve

Automatically selected kernels:
5.0.12-1-pve
4.15.18-18-pve
Run proxmox-boot-tool kernel remove to remove a kernel from the list of
manually selected kernels, for example:
# proxmox-boot-tool kernel remove 5.0.15-1-pve
Note
It's required to run proxmox-boot-tool refresh to update all EFI System
Partitions (ESPs) after a manual kernel addition or removal from above.
Determine which Bootloader is Used
The simplest and most reliable way to determine which bootloader is used, is to watch the boot process of the Proxmox Backup Server node.
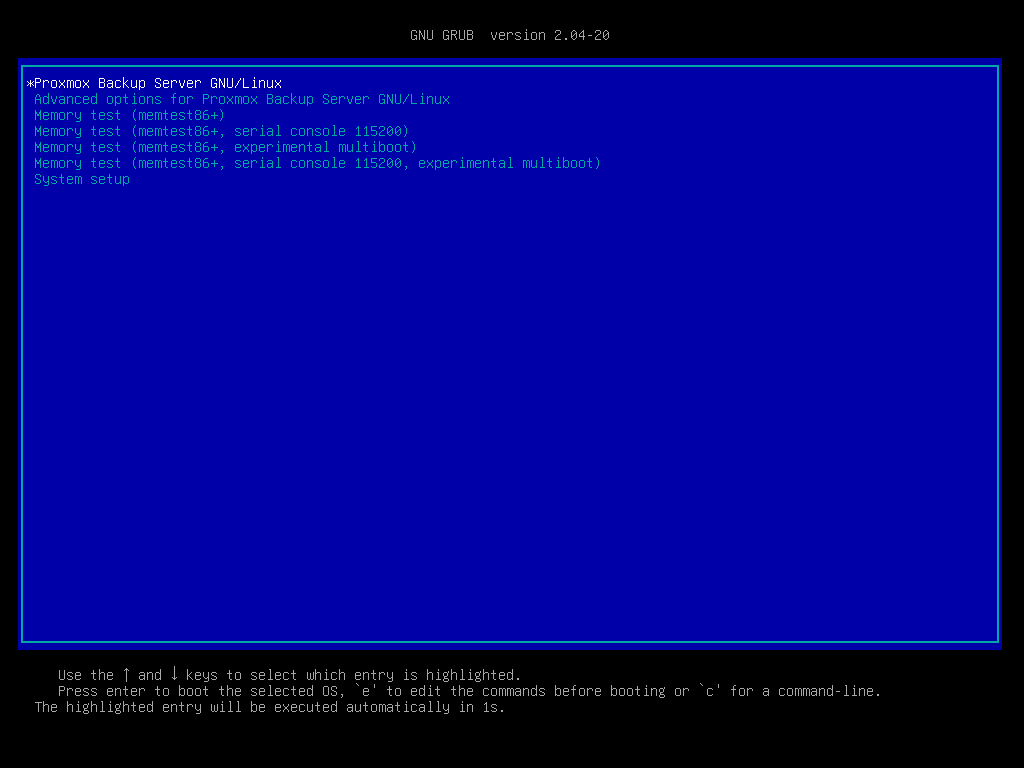
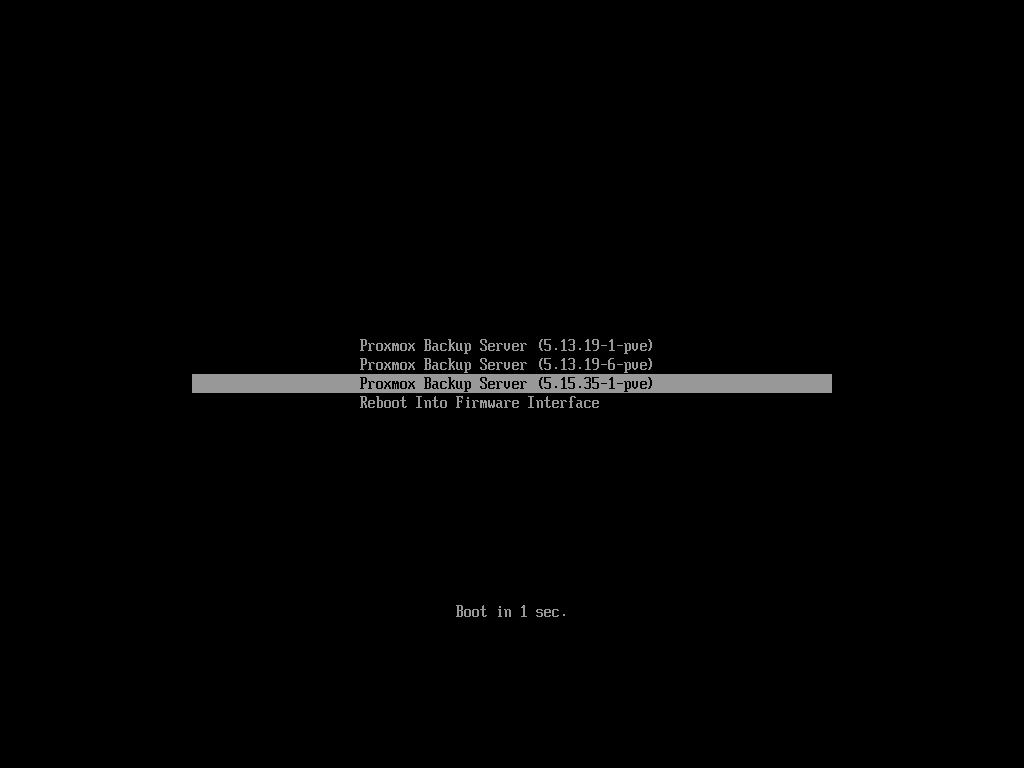
You will either see the blue box of grub or the simple black on white
systemd-boot.
Determining the bootloader from a running system might not be 100% accurate. The most reliable way is to run the following command:
# efibootmgr -v
If it returns a message that EFI variables are not supported, grub is used in
BIOS/Legacy mode.
If the output contains a line that looks similar to the following, grub is
used in UEFI mode.
Boot0005* proxmox [...] File(\EFI\proxmox\grubx64.efi)
If the output contains a line similar to the following, systemd-boot is used.
Boot0006* Linux Boot Manager [...] File(\EFI\systemd\systemd-bootx64.efi)
By running the following command, you can find out if proxmox-boot-tool is
configured, which is a good indication of how the system is booted:
# proxmox-boot-tool status
Grub
grub has been the de facto standard for booting Linux systems for many years
and is quite well documented
(see the Grub Manual).
Configuration
Changes to the grub configuration are done via the defaults file
/etc/default/grub or via config snippets in /etc/default/grub.d. To
regenerate the configuration file after a change to the configuration, run:
# update-grub
Note
Systems using proxmox-boot-tool will call
proxmox-boot-tool refresh upon update-grub
Systemd-boot
systemd-boot is a lightweight EFI bootloader. It reads the kernel and initrd
images directly from the EFI Service Partition (ESP) where it is installed.
The main advantage of directly loading the kernel from the ESP is that it does
not need to reimplement the drivers for accessing the storage. In Proxmox
Backup, proxmox-boot-tool is used to
keep the configuration on the ESPs synchronized.
Configuration
systemd-boot is configured via the file loader/loader.conf in the root
directory of an EFI System Partition (ESP). See the loader.conf(5) manpage
for details.
Each bootloader entry is placed in a file of its own, in the directory
loader/entries/
An example entry.conf looks like this (/ refers to the root of the ESP):
title    Proxmox
version  5.0.15-1-pve
options   root=ZFS=rpool/ROOT/pve-1 boot=zfs
linux    /EFI/proxmox/5.0.15-1-pve/vmlinuz-5.0.15-1-pve
initrd   /EFI/proxmox/5.0.15-1-pve/initrd.img-5.0.15-1-pve
Editing the Kernel Commandline
You can modify the kernel commandline in the following places, depending on the bootloader used:
Grub
The kernel commandline needs to be placed in the variable
GRUB_CMDLINE_LINUX_DEFAULT in the file /etc/default/grub. Running
update-grub appends its content to all linux entries in
/boot/grub/grub.cfg.
systemd-boot
The kernel commandline needs to be placed as one line in /etc/kernel/cmdline.
To apply your changes, run proxmox-boot-tool refresh, which sets it as the
option line for all config files in loader/entries/proxmox-*.conf.
Override the Kernel-Version for next Boot
To select a kernel that is not currently the default kernel, you can either:
Use the boot loader menu that is displayed at the beginning of the boot process
Use the
proxmox-boot-tooltopinthe system to a kernel version either once or permanently (until pin is reset).
This should help you work around incompatibilities between a newer kernel version and the hardware.
Note
Such a pin should be removed as soon as possible, so that all recent security patches from the latest kernel are also applied to the system.
For example, to permanently select the version 5.15.30-1-pve for booting, you
would run:
# proxmox-boot-tool kernel pin 5.15.30-1-pve
Tip
The pinning functionality works for all Proxmox Backup Server systems,
not only those using proxmox-boot-tool to synchronize the contents of
the ESPs, if your system does not use proxmox-boot-tool for
synchronizing, you can also skip the proxmox-boot-tool refresh call in
the end.
You can also set a kernel version to be booted on the next system boot only.
This is useful, for example, to test if an updated kernel has resolved an issue,
which caused you to pin a version in the first place:
# proxmox-boot-tool kernel pin 5.15.30-1-pve --next-boot
To remove any pinned version configuration, use the unpin subcommand:
# proxmox-boot-tool kernel unpin
While unpin has a --next-boot option as well, it is used to clear a pinned
version set with --next-boot. As that happens already automatically on boot,
invoking it manually is of little use.
After setting or clearing pinned versions, you also need to synchronize the
content and configuration on the ESPs by running the refresh subcommand.
Tip
You will be prompted to automatically do for proxmox-boot-tool managed
systems if you call the tool interactively.
# proxmox-boot-tool refresh
Secure Boot
Since Proxmox Backup Server 3.1, Secure Boot is supported out of the box via
signed packages and integration in proxmox-boot-tool.
The following packages need to be installed for Secure Boot to be enabled:
shim-signed(shim bootloader signed by Microsoft)shim-helpers-amd64-signed(fallback bootloader and MOKManager, signed by Proxmox)grub-efi-amd64-signed(Grub EFI bootloader, signed by Proxmox)proxmox-kernel-6.X.Y-Z-pve-signed(Kernel image, signed by Proxmox)
Only Grub as bootloader is supported out of the box, since there are no other pre-signed bootloader packages available. Any new installation of Proxmox Backup Server will automatically have all of the above packages included.
More details about how Secure Boot works, and how to customize the setup, are available in our wiki.
Switching an Existing Installation to Secure Boot
Warning
This can lead to an unbootable installation in some cases if not done correctly. Reinstalling the host will setup Secure Boot automatically if available, without any extra interactions. Make sure you have a working and well-tested backup of your Proxmox Backup Server host!
An existing UEFI installation can be switched over to Secure Boot if desired, without having to reinstall Proxmox Backup Server from scratch.
First, ensure all your system is up-to-date. Next, install all the required pre-signed packages as listed above. Grub automatically creates the needed EFI boot entry for booting via the default shim.
systemd-boot
If systemd-boot is used as a bootloader (see
Determine which Bootloader is used),
some additional setup is needed. This is only the case if Proxmox Backup Server
was installed with ZFS-on-root.
To check the latter, run:
# findmnt /
If the host is indeed using ZFS as root filesystem, the FSTYPE column should
contain zfs:
TARGET SOURCE           FSTYPE OPTIONS
/      rpool/ROOT/pbs-1 zfs    rw,relatime,xattr,noacl
Next, a suitable potential ESP (EFI system partition) must be found. This can be
done using the lsblk command as following:
# lsblk -o +FSTYPE
The output should look something like this:
NAME   MAJ:MIN RM  SIZE RO TYPE MOUNTPOINTS FSTYPE
sda      8:0    0   32G  0 disk
├─sda1   8:1    0 1007K  0 part
├─sda2   8:2    0  512M  0 part             vfat
└─sda3   8:3    0 31.5G  0 part             zfs_member
sdb      8:16   0   32G  0 disk
├─sdb1   8:17   0 1007K  0 part
├─sdb2   8:18   0  512M  0 part             vfat
└─sdb3   8:19   0 31.5G  0 part             zfs_member
In this case, the partitions sda2 and sdb2 are the targets. They can be
identified by the their size of 512M and their FSTYPE being vfat, in
this case on a ZFS RAID-1 installation.
These partitions must be properly set up for booting through Grub using
proxmox-boot-tool. This command (using sda2 as an example) must be run
separately for each individual ESP:
# proxmox-boot-tool init /dev/sda2 grub
Afterwards, you can sanity-check the setup by running the following command:
# efibootmgr -v
This list should contain an entry looking similar to this:
[..]
Boot0009* proxmox       HD(2,GPT,..,0x800,0x100000)/File(\EFI\proxmox\shimx64.efi)
[..]
Note
The old systemd-boot bootloader will be kept, but Grub will be
preferred. This way, if booting using Grub in Secure Boot mode does not work
for any reason, the system can still be booted using systemd-boot with
Secure Boot turned off.
Now the host can be rebooted and Secure Boot enabled in the UEFI firmware setup utility.
On reboot, a new entry named proxmox should be selectable in the UEFI
firmware boot menu, which boots using the pre-signed EFI shim.
If, for any reason, no proxmox entry can be found in the UEFI boot menu, you
can try adding it manually (if supported by the firmware), by adding the file
\EFI\proxmox\shimx64.efi as a custom boot entry.
Note
Some UEFI firmwares are known to drop the proxmox boot option on
reboot. This can happen if the proxmox boot entry is pointing to a Grub
installation on a disk, where the disk itself is not a boot option. If
possible, try adding the disk as a boot option in the UEFI firmware setup
utility and run proxmox-boot-tool again.
Tip
To enroll custom keys, see the accompanying Secure Boot wiki page.
Using DKMS/Third Party Modules With Secure Boot
On systems with Secure Boot enabled, the kernel will refuse to load modules which are not signed by a trusted key. The default set of modules shipped with the kernel packages is signed with an ephemeral key embedded in the kernel image which is trusted by that specific version of the kernel image.
In order to load other modules, such as those built with DKMS or manually, they
need to be signed with a key trusted by the Secure Boot stack. The easiest way
to achieve this is to enroll them as Machine Owner Key (MOK) with
mokutil.
The dkms tool will automatically generate a keypair and certificate in
/var/lib/dkms/mok.key and /var/lib/dkms/mok.pub and use it for signing
the kernel modules it builds and installs.
You can view the certificate contents with
# openssl x509 -in /var/lib/dkms/mok.pub -noout -text
and enroll it on your system using the following command:
# mokutil --import /var/lib/dkms/mok.pub
input password:
input password again:
The mokutil command will ask for a (temporary) password twice, this password
needs to be entered one more time in the next step of the process! Rebooting
the system should automatically boot into the MOKManager EFI binary, which
allows you to verify the key/certificate and confirm the enrollment using the
password selected when starting the enrollment using mokutil. Afterwards,
the kernel should allow loading modules built with DKMS (which are signed with
the enrolled MOK). The MOK can also be used to sign custom EFI binaries
and kernel images if desired.
The same procedure can also be used for custom/third-party modules not managed with DKMS, but the key/certificate generation and signing steps need to be done manually in that case.
Certificate Management
Access to the API and thus the web-based administration interface is always
encrypted through https. Each Proxmox Backup Server host creates by default its
own (self-signed) certificate. This certificate is used for encrypted
communication with the host’s proxmox-backup-proxy service, for any API
call between a user or backup-client and the web-interface.
Certificate verification when sending backups to a Proxmox Backup Server is either done based on pinning the certificate fingerprints in the storage/remote configuration, or by using certificates, signed by a trusted certificate authority.
Certificates for the API and SMTP
Proxmox Backup Server stores its certificate and key in:
/etc/proxmox-backup/proxy.pem/etc/proxmox-backup/proxy.key
You have the following options for the certificate:
Keep using the default self-signed certificate in
/etc/proxmox-backup/proxy.pem.Use an externally provided certificate (for example, signed by a commercial Certificate Authority (CA)).
Use an ACME provider like Let’s Encrypt to get a trusted certificate with automatic renewal; this is also integrated in the Proxmox Backup API and web interface.
Certificates are managed through the Proxmox Backup
web-interface/API or using the proxmox-backup-manager CLI tool.
Upload Custom Certificate
If you already have a certificate which you want to use for a Proxmox Backup host, you can simply upload that certificate over the web interface.

Note that any certificate key files must not be password protected.
Trusted certificates via Let’s Encrypt (ACME)
Proxmox Backup Server includes an implementation of the Automatic Certificate Management Environment (ACME) protocol, allowing Proxmox Backup Server admins to use an ACME provider like Let’s Encrypt for easy setup of TLS certificates, which are accepted and trusted by modern operating systems and web browsers out of the box.
Currently, the two ACME endpoints implemented are the Let’s Encrypt
(LE) production and staging environments.
Our ACME client supports validation of http-01 challenges using a
built-in web server and validation of dns-01 challenges using a DNS
plugin supporting all the DNS API endpoints
acme.sh does.
ACME Account
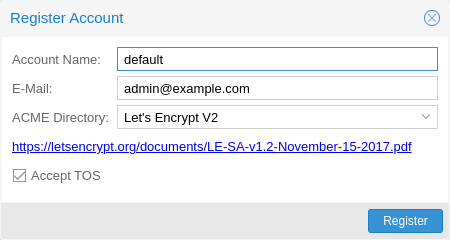
You need to register an ACME account per cluster, with the endpoint you want to use. The email address used for that account will serve as the contact point for renewal-due or similar notifications from the ACME endpoint.
You can register or deactivate ACME accounts over the web interface
Certificates -> ACME Accounts or using the proxmox-backup-manager
command-line tool.
proxmox-backup-manager acme account register <account-name> <mail@example.com>
Tip
Because of
rate-limits you
should use LE staging for experiments or if you use ACME for the
very first time until all is working there, and only then switch over
to the production directory.
ACME Plugins
The ACME plugin’s role is to provide automatic verification that you, and thus the Proxmox Backup Server under your operation, are the real owner of a domain. This is the basic building block of automatic certificate management.
The ACME protocol specifies different types of challenges, for example
the http-01, where a web server provides a file with a specific
token to prove that it controls a domain. Sometimes this isn’t possible,
either because of technical limitations or if the address of a record is
not reachable from the public internet. The dns-01 challenge can be
used in such cases. This challenge is fulfilled by creating a certain
DNS record in the domain’s zone.
Proxmox Backup Server supports both of those challenge types out of the
box, you can configure plugins either over the web interface under
Certificates -> ACME Challenges, or using the
proxmox-backup-manager acme plugin add command.
ACME Plugin configurations are stored in /etc/proxmox-backup/acme/plugins.cfg.
Domains
You can add new or manage existing domain entries under
Certificates, or using the proxmox-backup-manager command.
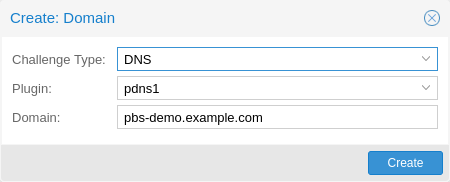
After configuring the desired domain(s) for a node and ensuring that the desired ACME account is selected, you can order your new certificate over the web-interface. On success, the interface will reload after roughly 10 seconds.
Renewal will happen automatically
ACME HTTP Challenge Plugin
There is always an implicitly configured standalone plugin for
validating http-01 challenges via the built-in web server spawned on
port 80.
Note
The name standalone means that it can provide the validation on
its own, without any third party service.
There are a few prerequisites to use this for certificate management with Let’s Encrypts ACME.
You have to accept the ToS of Let’s Encrypt to register an account.
Port 80 of the node needs to be reachable from the internet.
There must be no other listener on port 80.
The requested (sub)domain needs to resolve to a public IP of the Proxmox Backup Server host.
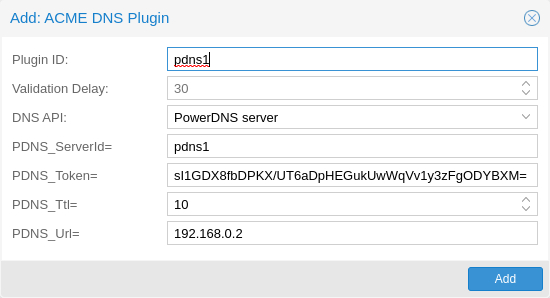
ACME DNS API Challenge Plugin
On systems where external access for validation via the http-01
method is not possible or desired, it is possible to use the dns-01
validation method. This validation method requires a DNS server that
allows provisioning of TXT records via an API.
Configuring ACME DNS APIs for validation
Proxmox Backup Server reuses the DNS plugins developed for the
acme.sh [1] project. Please refer to its documentation for details
on configuration of specific APIs.
The easiest way to configure a new plugin with the DNS API is using the
web interface (Certificates -> ACME Accounts/Challenges).
Here you can add a new challenge plugin by selecting your API provider and entering the credential data to access your account over their API.
Tip
See the acme.sh How to use DNS API wiki for more detailed information about getting API credentials for your provider. Configuration values do not need to be quoted with single or double quotes; for some plugins that is even an error.
As there are many DNS providers and API endpoints, Proxmox Backup
automatically generates the form for the credentials, but not all
providers are annotated yet. For those you will see a bigger text area,
into which you simply need to copy all the credential’s
KEY=VALUE pairs.
DNS Validation through CNAME Alias
A special alias mode can be used to handle validation on a different
domain/DNS server, in case your primary/real DNS does not support
provisioning via an API. Manually set up a permanent CNAME record
for _acme-challenge.domain1.example pointing to
_acme-challenge.domain2.example, and set the alias property in
the Proxmox Backup Server node configuration file /etc/proxmox-backup/node.cfg
to domain2.example to allow the DNS server of domain2.example to
validate all challenges for domain1.example.
Wildcard Certificates
Wildcard DNS names start with a *. prefix and are considered valid
for all (one-level) subdomain names of the verified domain. So a
certificate for *.domain.example is valid for foo.domain.example
and bar.domain.example, but not for baz.foo.domain.example.
Currently, you can only create wildcard certificates with the DNS challenge type.
Combination of Plugins
Combining http-01 and dns-01 validation is possible in case your
node is reachable via multiple domains with different requirements / DNS
provisioning capabilities. Mixing DNS APIs from multiple providers or
instances is also possible by specifying different plugin instances per
domain.
Tip
Accessing the same service over multiple domains increases complexity and should be avoided if possible.
Automatic renewal of ACME certificates
If a node has been successfully configured with an ACME-provided
certificate (either via proxmox-backup-manager or via the web-interface/API), the
certificate will be renewed automatically by the proxmox-backup-daily-update.service.
Currently, renewal is triggered if the certificate either has already
expired or if it will expire in the next 30 days.
Manually Change Certificate over the Command Line
If you want to get rid of certificate verification warnings, you have to generate a valid certificate for your server.
Log in to your Proxmox Backup Server via ssh or use the console:
openssl req -newkey rsa:2048 -nodes -keyout key.pem -out req.pem
Follow the instructions on the screen, for example:
Country Name (2 letter code) [AU]: AT
State or Province Name (full name) [Some-State]:Vienna
Locality Name (eg, city) []:Vienna
Organization Name (eg, company) [Internet Widgets Pty Ltd]: Proxmox GmbH
Organizational Unit Name (eg, section) []:Proxmox Backup
Common Name (eg, YOUR name) []: yourproxmox.yourdomain.com
Email Address []:support@yourdomain.com

Please enter the following 'extra' attributes to be sent with your certificate request
A challenge password []: not necessary
An optional company name []: not necessary
After you have finished the certificate request, you have to send the
file req.pem to your Certification Authority (CA). The CA will issue
the certificate (BASE64 encoded), based on your request – save this file
as cert.pem to your Proxmox Backup.
To activate the new certificate, do the following on your Proxmox Backup
cp key.pem /etc/proxmox-backup/proxy.key
cp cert.pem /etc/proxmox-backup/proxy.pem
Then restart the API servers:
systemctl restart proxmox-backup-proxy
Test your new certificate, using your browser.
Note
To transfer files to and from your Proxmox Backup, you can use
secure copy: If your desktop runs Linux, you can use the scp
command-line tool. If your desktop PC runs windows, please use an scp
client like WinSCP (see https://winscp.net/).
External Metric Server
Proxmox Backup Server periodically sends various metrics about your host's memory, network and disk activity to configured external metric servers.
Currently supported are:
InfluxDB (HTTP) (see https://docs.influxdata.com/influxdb/v2/ )
InfluxDB (UDP) (see https://docs.influxdata.com/influxdb/v1/ )
The external metric server definitions are saved in '/etc/proxmox-backup/metricserver.cfg', and can be edited through the web interface.
Note
Using HTTP is recommended as UDP support has been dropped in InfluxDB v2.
InfluxDB (HTTP) plugin configuration
The plugin can be configured to use the HTTP(s) API of InfluxDB 2.x. InfluxDB 1.8.x does contain a forwards compatible API endpoint for this v2 API.
Since InfluxDB's v2 API is only available with authentication, you have to generate a token that can write into the correct bucket and set it.
In the v2 compatible API of 1.8.x, you can use 'user:password' as token (if required), and can omit the 'organization' since that has no meaning in InfluxDB 1.x.
You can also set the maximum batch size (default 25000000 bytes) with the 'max-body-size' setting (this corresponds to the InfluxDB setting with the same name).
InfluxDB (UDP) plugin configuration
Proxmox Backup Server can also send data via UDP. This requires the InfluxDB server to be configured correctly. The MTU can also be configured here if necessary.
Here is an example configuration for InfluxDB (on your InfluxDB server):
[[udp]]
   enabled = true
   bind-address = "0.0.0.0:8089"
   database = "proxmox"
   batch-size = 1000
   batch-timeout = "1s"
With this configuration, the InfluxDB server listens on all IP addresses on port 8089, and writes the data in the proxmox database.
Service Daemons
proxmox-backup-proxy
This daemon exposes the whole Proxmox Backup Server API on TCP port 8007 using
HTTPS. It runs as user backup and has very limited permissions. Operations
requiring more permissions are forwarded to the local proxmox-backup
service.
proxmox-backup
This daemon exposes the Proxmox Backup Server management API on
127.0.0.1:82. It runs as root and has permission to do all
privileged operations.
NOTE: The daemon listens to a local address only, so you cannot access
it from outside. The proxmox-backup-proxy daemon exposes the API
to the outside world.
Command-line Tools
proxmox-backup-client
This tool implements a backup server client, i.e. it can connect to a backup servers to issue management commands and to create or restore backups.
proxmox-backup-manager
This tool exposes the whole backup server management API on the command line.
proxmox-tape
This tool can configure and manage tape backups.
pmt
The pmt command controls Linux tape devices.
pmtx
The pmtx command controls SCSI media changer devices (tape
autoloader).
pxar
pxar is a command-line utility for creating and manipulating archives in the
Proxmox File Archive Format (.pxar).
It is inspired by casync file archive format,
which caters to a similar use-case.
The .pxar format is adapted to fulfill the specific needs of the
Proxmox Backup Server, for example, efficient storage of hard links.
The format is designed to reduce the required storage on the server by
achieving a high level of deduplication.
Creating an Archive
Run the following command to create an archive of a folder named source:
# pxar create archive.pxar /path/to/source
This will create a new archive called archive.pxar with the contents of the
source folder.
Note
pxar will not overwrite any existing archives. If an archive with
the same name is already present in the target folder, the creation will
fail.
By default, pxar will skip certain mount points and will not follow device
boundaries. This design decision is based on the primary use case of creating
archives for backups. It makes sense to ignore the contents of certain
temporary or system specific files in a backup.
To alter this behavior and follow device boundaries, use the
--all-file-systems flag.
It is possible to exclude certain files and/or folders from the archive by
passing the --exclude parameter with gitignore-style match patterns.
For example, you can exclude all files ending in .txt from the archive
by running:
# pxar create archive.pxar /path/to/source --exclude '**/*.txt'
Be aware that the shell itself will try to expand glob patterns before invoking
pxar. In order to avoid this, all globs have to be quoted correctly.
It is possible to pass the --exclude parameter multiple times, in order to
match more than one pattern. This allows you to use more complex
file inclusion/exclusion behavior. However, it is recommended to use
.pxarexclude files instead for such cases.
For example you might want to exclude all .txt files except a specific
one from the archive. This would be achieved via the negated match pattern,
prefixed by !. All the glob patterns are relative to the source
directory.
# pxar create archive.pxar /path/to/source --exclude '**/*.txt' --exclude '!/folder/file.txt'
Note
The order of the glob match patterns matters, as later ones override earlier ones. Permutations of the same patterns lead to different results.
pxar will store the list of glob match patterns passed as parameters via the
command line, in a file called .pxarexclude-cli, at the root of the archive.
If a file with this name is already present in the source folder during archive
creation, this file is not included in the archive, and the file containing the
new patterns is added to the archive instead. The original file is not altered.
A more convenient and persistent way to exclude files from the archive is by
placing the glob match patterns in .pxarexclude files.
It is possible to create and place these files in any directory of the filesystem
tree.
These files must contain one pattern per line, and later patterns override
earlier ones.
The patterns control file exclusions of files present within the given directory
or further below it in the tree.
The behavior is the same as described in Creating Backups.
Extracting an Archive
An existing archive, archive.pxar, is extracted to a target directory
with the following command:
# pxar extract archive.pxar /path/to/target
If no target is provided, the contents of the archive is extracted to the current working directory.
In order to restore only parts of an archive, single files, and/or folders, it is possible to pass the corresponding glob match patterns as additional parameters or to use the patterns stored in a file:
# pxar extract etc.pxar /restore/target/etc --pattern '**/*.conf'
The above example restores all .conf files encountered in any of the
sub-folders in the archive etc.pxar to the target /restore/target/etc.
A path to the file containing match patterns can be specified using the
--files-from parameter.
List the Contents of an Archive
To display the files and directories contained in an archive archive.pxar,
run the following command:
# pxar list archive.pxar
This displays the full path of each file or directory with respect to the archive's root.
Mounting an Archive
pxar allows you to mount and inspect the contents of an archive via FUSE.
In order to mount an archive named archive.pxar to the mount point /mnt,
run the command:
# pxar mount archive.pxar /mnt
Once the archive is mounted, you can access its content under the given mount point.
# cd /mnt
# ls
bin   dev  home  lib32  libx32      media  opt   root  sbin  sys  usr
boot  etc  lib   lib64  lost+found  mnt    proc  run   srv   tmp  var
proxmox-file-restore
Command-line tool for restoring files and directories from Proxmox Backup archives. In contrast to proxmox-backup-client, this supports both container/host and VM backups.
proxmox-backup-debug
Implements debugging functionality to inspect Proxmox Backup datastore files, verify the integrity of chunks.
The 'diff' subcommand allows comparing .pxar archives for two arbitrary snapshots. A list of added/modified/deleted files will be displayed.
Also contains an 'api' subcommand where arbitrary api paths can be called (get/create/set/delete) as well as display their parameters (usage) and their child-links (ls).
By default, it connects to the proxmox-backup-proxy on localhost via https, but by setting the environment variable PROXMOX_DEBUG_API_CODE to 1 the tool directly calls the corresponding code.
Warning
Using PROXMOX_DEBUG_API_CODE can be dangerous and is only intended for debugging purposes. It is not intended for use on a production system.